Good Day Thrifties!
As much as I love sharing with you as The Thrifty Gemini, the time has come for me to move on. This is due to a few life changes. I'm gone...but not really.
This blog will still remain open for reference, but I'm moving. I invite you to come with me to my new blog--Teacher Of Good Things. Check me out at http://teacherofgoodthings.blogspot.com. Hope to see you there. Shalum.
Saturday, January 9, 2016
Monday, September 21, 2015
Canning: Salsa
Greetings Thrifties! It's been a while. I haven't been in the garden as often, a new man in my life, and some technological issues are amongst some of the reason why I haven't blogged lately. I'm trying to get back into the swing of things!
Well, for one, I've done my second canning project this past Labor Day weekend. I have so many ripe tomatoes from the garden--from Black Krim and Brandywine to Mortagage Lifter and Cherokee Purple. They were sitting in the fridge (although I know that there is a rule for NOT putting them in the fridge. I wanted to prevent an infestation of fruit flies), and I wasn't going to eat them right away. Unfortunately, some of them rotted, so I have to throw them away. To prevent further waste, I decided to take the good ones and make salsa out of them. As I mentioned above, this is my second canning project (my first was some Cranberry Apple Preserves--with which I gave away for Christmas gifts), so here's how I did:

Here is some of my harvest. There are two Branywines and a Mortgage Lifter--along with this huge zucchini. I may just shred the zucchini and freeze it for zucchini bread. If I do that, I'll provide an entry on it.

More tomatoes. There are two Black Krims, two Cherokee Purples, and the rest are Rutgers. All of these tomatoes are going into my salsa. In short...this will NOT be your average salsa.
Oh, and in addition to the tomatoes are some jalapeno and cayenne peppers. The jalapenos will be used in the salsa. The cayennes will be dried and used for either red pepper flakes or for ground cayenne pepper.

The recipe (which I got from the book for which I learned to can) called for 6 cups of diced tomatoes. Most of the tomatoes above are included in this pic. As I also mentioned above, some of them rotted and were therefore disposed. Being that this is the case and before proceeding, I had to run some errands. One of them included going to the garden to see if there were other ripe tomatoes. In addition to what's in the first two pics above, I included some San Marzano and red grape tomatoes--which I did pick up from the garden. This is going to be DELICIOUS!!!!

In addition to 6 cups of tomatoes, what's also needed is 3 cups of diced red onions, 15 cloves of chopped garlic and 6 seeded jalapeno peppers. I deviated slightly in terms of the jalepenos--as I wanted a spicier salsa. So, to give me the extra heat without entirely burning my mouth off, I seeded 3 peppers and left the seeds in the other three. Now, in terms of the garden factor, sadly I had to buy the onions and garlic, but the jalepenos DEFINITELY came from my garden.
(NOTE: The heat in jalapenos come from the seeds. To remove the seeds, cut the top off, and then cut a slit down the length of the pepper. Open the pepper, and take a small knife or implement to remove the seeds. A rule of thumb is to wear gloves when working with hot peppers because your fingers may have residual capsaicin on them (i.e. the heat factor). If capsaicin gets to a mucus membrane (i.e. nose, eyes), then such an1. area can start to burn....OUCH. Because I didn't have gloves, that is the reason I used a small knife and scraped out the seeds).

Next, 1 1/4 cups of chopped cilantro. I didn't grow cilantro this year, so I bought this. It was only a $1.49 a packet, but I know the thrifty factor would DEFINITELY be in growing it. I hear that it bolts (i.e. goes to seed) very quickly, but maybe next year.
Interestingly, cilantro had to grow on me. At first, I thought it was disgusting--tasting like soap. THEN, when I started getting steak or chicken burritos at Chipotle and seeing that the rice is Cilantro-Lime rice, I actually started to like it. Who knew???? I even started to like the smell I was chopping it. With the aroma, I have other things in mind with which to use cilantro.

Here are all of the ingredients in a large stock pot. The recipe also called for a dried hot chile, red wine vinegar, and red pepper flakes.
The dried chile was to be re-hydrated, pureed, and added to the mix. Unfortunately, I didn't have one, so that ingredient was omitted.
I was out of red wine vinegar, but I have white wine vinegar. Oh well. So what did I do? I chucked it in there! Who knows, it'll probably still taste good!
Because I didn't have the first two ingredients (I forgot them while out running my errands), I added extra red pepper flakes (the recipe called for one tablespoon. I think I put in two)
The ingredients were to simmer for about 10-15 minutes or until it thickens. I don't think it thickened too much, so I let it simmer a little longer.

Once done, I put in the canning jars. The yield was for 6 pints, but I only had half-pint jars handy. Again...another deviation! The empty jars were in this canner--which had hot water in it and was on low to keep hot. The purpose in this was to keep the jars sterilized. In hindsight, I should've have the other steps handy (i.e. sterilzation of jars and lids), but I will provide that in another canning entry. I promise.
Any-who, the after filling the jars, I added more hot water to the canner--so that the jars were covered about an inch or two from the top. It was brought to a boil and then allow to simmer (or process--meaning the lids had to adhere to the jar in order to preserve the contents inside) for about 15 minutes.

Fifteen minutes...done.
NOW, the jars needed to be removed from the canner, put onto a towel and kept approximately two inches apart. The jars are to cool for about 12-24 hours. That way, the jars didn't burst and the lids were given more time to seal better.

And here is the finished product. It definitely has a kick to it. You can also taste the "freshness"--in that it is WAAAAAY different than what you would get from the store. I've shared it with others, and it has gotten rave reviews! I have some more tomatoes and peppers the garden that have yet to be picked. Perhaps another batch is in order...lol
Any-who, please consider making and canning your own salsa as a healthier alternative than what's in the store--and as a cost effective one. Being that this blog is titled, "The Thrifty Gemini", let's have a look at the thrifty factor....
The cost of the canning jars were about $12. There were 12 jars in a pack--so that $1 per jar. Considering this, I only used 10 jars. The cilantro was $1.49 a pack, the onions (I bought 2) were about $3, and the garlic was $.50 a head (one head was sufficient). The white wine vinegar and the red pepper flakes were items that I already had in the cost. Considering that, for this project, I paid nothing for the tomatoes, jalapenos, white wine vinegar and red pepper flakes, and the amounts paid for the items noted above, the total cost per jar came out to about $1.49. In an "un-scientific" comparison, the prices averaged between $2.50 and 3.50 for some of the most popular store bought salsas. Need I say more on the thrifty factor.
I hope that you try this recipe. If you have tomatoes in your garden, I encourage you to try this recipe. If you don't have a garden, but have a farmer's market or farm stand (yes, tomatoes are still in season. We are, however, approaching the end of the season), I encourage you to get those tomatoes. I wouldn't recommend buying them at the grocery store because of both the carbon footprint (the average of how much it costs to ship food to any given place) and the fact that those store bought tomatoes have no flavor (as they are picked while still green and artificially ripened with ethylene gas) and chances are, they were grown with a myriad of pesticides and other chemicals. I highly champion eating organic and/or local as much as possible--as well as eating in season. What's more local than your garden or local farmstand? And in terms of the seasonality, this is the perfect way to use produce in the peak of their season, and preserve it--so you can have a taste of that seasonality in colder months. If you make this, please let me know in the comments as to how it turned out for you. That being said, thanks for stopping by and...Think Thrifty!
Tuesday, August 4, 2015
Cooking/Baking: 7-Up Cake
Good Day Thrifties! This past Sunday, August 2nd, was my church picnic. When the announcement was made to when it was to take place, I noted on the sign-up sheet that I was making a 7-Up Cake. 7-Up cake?? Cake with soda--some people may ask. YES! Cake with soda. The soda lightens up the batter and gives it a more airy texture.
And for those who are familiar with 7-Up cake, knows that this is not a new thing. This is one of those cakes that you rarely see people make anymore. The first (and only times) I've had 7-Up cake was at church functions, so yes y'all, I'm bringing it back!
I started making them last year, and my research began with finding a recipe. What you're about to see below is a slight deviation from the recipe I found--as it calls for lemon extract instead of a fresh lemon. However, in the spirit of "The Thrifty Gemini", I opted for the latter. Let's see...$4.29 for the former, and $.79 for the latter--you do the math.
Any-who, below is how I make 7-Up cake, and I encourage you all to try this one-of-a-kind classic dessert!
Also, a bit of a disclosure, I'm baking the night before (Saturday, August 1st), and this is after spending 7 hours in the garden. That being said, I was rather tired and achy, but I had an obligation to keep:

The batter for a 7-Up cake is a rich one. The raw ingredients include: 1 1/2 cups of butter (or three sticks. One stick is a 1/2 cup or 4 oz), 3 cups of sugar, 5 eggs (yes, 5 EGGS--ALMOST A HALF DOZEN), 3 cups of flour, 1 cup of 7-Up (or any lemon lime soda), and the juice and zest of one lemon.
In the spirit of "The Thrifty Gemini", all of the raw ingredients were either purchased at The Dollar Tree or a discount grocery store chain (i.e. Save-A-Lot--which is two or three businesses away from The Dollar Tree in my area). Each of these items either cost $1 (i.e. the flour, sugar, and soda. Speaking of soda, I would usually use the actual 7-Up, but in the spirit of being thrifty, opted for the brand at the Dollar Tree--which was $1 for a 3-liter bottle), under $1 (i.e. the lemon--which was $.79), or somewhat over $1, but not too much (i.e. the eggs--which was $2.19/dozen and the butter--which was $2.49 a package). The total amount spent for these ingredients were $8.47, but to make one cake, it would cost about half. I say that because these ingredients weren't all going to be used all at once as purchased, so you have some ingredients left over to make another cake.

Here are the ingredients again--only with the sugar and flour measured/sifted. The eggs and the butter are to be a room temperature prior to use. This makes it easier to work with them, and hence, make you cake batter much smoother. In order to achieve room temperature, I usually let them set out for about an hour and a half. I also notice that the butter will soften faster if left in the wrapper--as opposed to have them fully exposed.

Preheat the oven to 325 F (or 160/163 C).


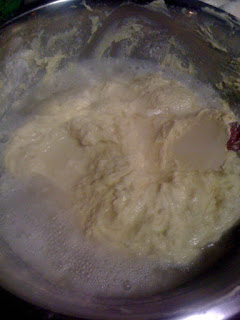
Add the butter and sugar to a bowl (left) and start creaming (or get it whipped and smooth). It will have a creamy, yet somewhat gritty texture (right), but it's all good. Everything will smooth out in the end.

Add the eggs, one at a time. Most baking recipes note to add eggs this way. In my experience, it helps for better incorporation--so that the batter is smoother and richer than what you would get if you add all of the eggs at once.
(THRIFTY TIP: Upon adding the eggs, DO NOT throw away the egg shells. Put the egg shells into your compost bin. Crops like tomatoes LOVE the calcium from egg shells. It helps prevent blossom end rot. More on composting in another entry)


Here is what it looks like when all of the eggs have been thoroughly incorporated. The texture is airy and fluffy. To show such fluffiness, I have it up on the rubber spatula on the right.


Next, add the flour, approximately one cup at a time. Fold in with a rubber spatula until thoroughly incorporated. To do so a little at a time--as opposed to all at once, helps to mix it in better. And although it does get a little more difficult to mix once more flour is added, adding a little at a time helps make the mixing (or folding) less difficult.
In the pic on the right is what the batter looks like when all of the flour has been folded. It's really heavy and sort of has the consistency of either bread or biscuit dough. With the mixing, some of the dough will move up on the sides of the bowl, so take a little time to scrape down the sides of the bowls as much and as best possible.


Once you get a feel of the dough, I'm sure you'll be wondering, "How am I going to get this heavy batter in the cake pan"? Hence...the soda. Add one cup of 7-Up or lemon lime soda to the batter--as per the pic on the right. I'm sure you're thinking that it's going to make it too liquid, but I assure you it won't. Just like the flour, fold the soda in. And because you can gain a little more momentum, you can also gently stir it as well.


Next, add your lemon. The first thing you'll want to do is to zest the lemon--hence the Microplane grater in the pic on the left (I got this several years ago at Williams-Sonoma. If my memory serves me correct, I think I paid about $10-$15 for it. This was before "The Thrifty Gemini", and I'm sure I can probably find one cheaper--that is if I look hard enough. If not, then it is indeed a good investment. It can be used to zest citrus or to grate hard cheeses like Parmesan. It's a wonderful tool).
When zesting, your aim is, with the grates, to shave off the yellow skin only, and leaving the white, bitter pith on the lemon. Once once get the zest, take the whole, uncut lemon and roll it with a bit of pressure (as in the pic on the right). Rolling the lemon helps when squeezing it for juice. The rolling, so to speak, "loosens" the juice inside. Then, cut it in half.
(THRIFTY TIP: Just like the egg shells, the used lemon is also good for the compost pile/heap/bin. ANY organic material (as long as there is not meat or fat) is good for composting)

Take you zest and juice, and add it to the fold. Mix it into the batter. Once mixed, then it is ready for the pan


For this cake, I'm using a Bundt pan. On the left is a clean, dry pan, On the right is a greased pan. I had some Pam for Baking in the house, so I used that. Unfortunately, there wasn't enough to cover the top of the pan, so I used butter on the areas where no Pam was applied (if you don't have Pam or any type of non-stick cooking/baking spray, make sure that you THOROUGHLY grease the pan. This cake WILL stick, It has happened to me with my first cake. Trust me, it can NEVER be greased enough).

There she is...ready for the oven.

We've already preheated the oven to 325 F. Bake the cake at this temperature for 1 1/4 hours. While the cake was baking, that gave me time to take a relaxing shower--after my day in the garden, and get into my pj's. It's 11pm, and I'm in for the night!


Fresh out of the shower, in my pj's, and the cake is still baking. While it is still in the oven, I thought it a fine time to prepare the glaze--which is simply 1 1/2 cups of confectioners' (icing) sugar and 1/4 cup of the lemon lime soda. Mix vigorously until smooth. You can also add a little more sugar if you want it thicker or more soda if you want it thinner. The consistency of the glaze is up to you; however, what I mentioned above is what I used. Either way, it will still be delicious!

Cake...done! Now to remove her from the pan, and PRAY that she doesn't stick. This is going to be done IMMEDIATELY after removing from oven. Take a plate, put it on top, flip the cake pan over, and tap the sides and the top with a knife (the tapping is a trick that my mother taught me). The tapping should help the cake further release from the pan. Just like in the three bears, don't tap the pan too hard or too soft, but just right.


Voila! On the left is the just released cake. YAY!! It all came out!
On the right is the cake with the glaze..ready to enjoy. Now, this case can be eaten warm, but because this for the church picnic. I must exhibit self-control.

Have a piece and enjoy! Rich, moist, light, airy...all at one time. Delicious!
Because I've had such an activity-packed day, for fun and giggles, the pics below highlight my day in three stages:

Just getting out of bed.

Dressed and ready to go.

Right before bedtime.
In conclusion, I hope you take some time to make the cake. Please let me know how it turns out--as well as posting some pics with your response.
This is one of many cooking posts that I will do. Although there are more gardening posts, we are in the middle of the season--hence those kind of posts.
Thanks for taking the time to check out "The Thrifty Gemini", and remember, this entire cake can be made for approximately $4 with some bargain hunting. A nice price to pay for deliciousness. So until then, Think Thrifty!
Friday, July 31, 2015
Cooking: Patty Pan Squash
Any-who, since I've neither grown, prepared, nor tasted patty pan squash, this is a journey in starting something new (and as far as the Thrifty factor is concerned, these costs me nothing financially--as they were given to me). So armed some research on preparation--as well as a recipe that I found online for roasted patty pan squash, here it goes:

Here is one of two patty pan squashes. The reason I'm showing one is because the other one has already been cut into pieces.

Here is the one squash that was cut. Because of the shape, I cut it in half, then in quarters, then eighths, then sixteenths

Both squashes, now cut into sixteenths.

In the bowl, ready for some seasoning

Speaking of seasoning, here we are. Now, salt and pepper is an absolute essential, and in my house, I always keep kosher salt and a jar of peppercorns with a grinder.
I prefer kosher salt because I find that it seasons the food better without using too much salt. I find table salt a bit too harsh, and the kosher salt sort of melts and therefore, provides a more even seasoning.
In addition, I also prefer freshly cracked black pepper--as it provides more flavor than your typical ground pepper. I'd rather have that coarser texture season my food--as opposed to the stuff that looks like it came from an ashtray.
Also in my arsenal of seasonings is Herbes De Provence--which is a blend of herbs that was developed in the Provence region of France. There are quite a few variations, but this variation (if can recall because I the container is now gone) contains: parsley, rosemary, savory, and thyme. This is the perfect blend for roasting just about anything. I've used it when making roast chicken--as well as roasted vegetable for a fish dish, and it really enhances the flavor.
Last, but not least...oil. My preference is olive oil--for both flavor and health qualities.
So what I did was add the oil first, then the salt, pepper, and Herbes de Provence in that order to the squash. Then mix it up to make the seasoning and oil even distributed throughout the squash

Preheat the oven to 450 F, and roast for about 20-25 minutes until tender.

Done. Look at the color on the edges of some of those pieces! Color = flavor

Squash is served. I just put it in a bowl to try it. It tastes somewhat similar to zucchini. As you can see, some of them have more color on them, and those are the pieces that I enjoyed the most. As I said above, color = flavor, and it was awesome. Another favorite part of mine were the edges that crisped up. The color from the roasting also brought about a hint of sweetness. Being that this was my first time making them, I think next time, I will turn the pieces halfway through the roasting process--so they can get color on both sides. Also, it could've used a little more salt for my tastes, so I will mix it up in a bigger bowl. But overall, I would have it again, and perhaps, considering growing it next year.
I have never seen patty pan squash in the grocery store, so perhaps your best bet would be to find it at a farm stand or farmer's market. However, if you do find it at a grocery store (perhaps you may be fortunate enough to have a Whole Foods or Trader Joe's--which I do not have), then by all means, try it. Or to Think Thrifty, get a packet of seeds and grow some yourself. By doing this, the amount of squash you get--EVEN if you plant one seed, will more than pay for the packet of seeds.
In conclusion, I give patty pan squash a passing grade. Thank you Charlene for blessing me with such yummy-ness!
So until then, Think Thrifty! Dawn
Thursday, July 30, 2015
Garden Update--7/13 through 7/25/2015
Greetings, Thrifties! Time for another episode of "Garden Update"! We are in the pinnacle of the growing season, and the garden is truly THRIVING. I must say that, in the 3 years that I've been gardening, this has been my best year so far. I am, by no means, an expert. I still make mistakes and I'm still learning. I'm excited for you to see the progress:


As of today (7/29/2015), I went there and harvested a few grape tomatoes, yellow pear tomatoes, cucumbers, carrots, and one zucchini. As I was observing and checking out the garden, I saw that my cucumber plants were starting to dry out and get yellow. This is a concern in terms of health and production. So, I'm going to do some research, apply that research, and provide a follow-up in the next update. So until then...Think Thrifty!


This past Saturday, I knew that I was going to be there all day. That being said, a good breakfast was in order, and for that breakfast is an omelet with whole wheat toast and ginger peach black tea, sweetened with organic evaporated can sugar juice.


Check this out! My first tomato of the season! This tomatoes in both of these pictures are Black Krim. The one on the left was more than ready, and as you can see, the one on the right still needs a little more ripening. And by the way, it was DELICIOUS. It had acidity and savory-ness to it.


These are the yellow pear tomatoes...or shall I say "green, but will be turning yellow soon". As you can see, they are abundant. I JUST NEED THEM TO TURN! LITTLE TEASERS!


These are grape tomatoes. You know, the little plum tomatoes that you see in the grocery store for snacking and salads. There's no need to buy them when I can grow them. NOW COME ON AND TURN!!

These are the San Marzano tomatoes. I would like these to turn as well, but I'm in no rush for these. Unlike the others, these tomatoes will be canned--so that we can have wonderful spaghetti sauce after the season is over. When I'm ready to can, I will do an entry. Stay tuned.


Remember these???? These were those basil plants that I bought some time ago--that looked like they were on their last leg. See what I mean when I said a little love and care in the last entry?? And you would not have known that they were EVER on the verge of dying. My only issue with at least two of these plants was that they were on the verge of going to seed. I'm not ready for that; otherwise, the basil becomes tough and inedible. To keep basil from (or to slow down) bolting (preparation for seeds), simply deadhead them. To do that, all you do is just remove the "seed pouches" that grow at the top. Now that I'm typing this, I should've taken pictures and and demostration. Next garden update...I promise.


Once again, I have another...WEEDY...MESS!!! This is near the cucumbers, and I need to weed over there to check on them--as well as expose the dill for further growth.


On the left is before weeding. The big leaves that you see are the cucumber plants. On the right is one side of the cucumber bed. The weeds are in the path, and will dry out and die. They'll keep the paths from growing new weeds for a more prolonged period of time--as it shades the paths and thus keep the weeds from growing. Weeds thrive on light, and the covering of the light robs them of that.


Cucumbers and Dill. The frilly leaves are the dill. These are good companion plants, AND it attracts pollinators. One in particular is the Black Swallotail Butterfly. Usually, the butterflies will lay their eggs, and I've actually saw a couple of larvae. Dill (and fennel) are popular foods for the larvae. They may do a little number on them, but I don't mind. I'm down for attracting and increasing the number of pollinators in my garden. In addition, the larvae (caterpillars) are really pretty. They are black with turqoise and celadon stripes. I got excited when I saw the couple during this weeding--that I purposedly placed them near the dill for their feeding. I'm sure in another week or two I'll see them get bigger. The ones I saw were about the size of pill bugs


Top left: A plethora of cucumber blossoms. I've seen honeybees and bumblebees in there pollinating them, so I'm expecting so awesome cucumbers soon. I surmise that, just like the green beans (I had 3 LARGE pickings--of about10-15 lbs), I will have a plentiful cucumber harvest as well.
Top right and bottom left: Little cucumbers. As you can see, they still have some growing to do. Thank you pollinators!
Bottom right: A cucumber that's ready for harvest. As I mentioned in an earlier post, these are the National Pickling variety. They're shorter, fatter, and are the PERFECT size for making pickles...which is the plan. When I'm ready to make pickles, I will provide an entry.


Like tomatoes, what is a garden without zucchini? Despite the fact that I planted them late, I'm happy to see them coming.
Top left: Emerging
Top right: Growing
Bottom: Harvested


ANOTHER must for a summer garden...corn. As with the zucchini, I planted these late (actually, they're both in the same bed). If you look at the base of the corn plants, the dark matter on there is coffee grounds. Corn is a heavy feeder--mainly with nitrogen. For the last couple of years, I would plant pole beans to give corn its nitrogen. I didn't get a chance to do that this year, so I'm manually added nitrogen in the form of coffee grounds
(THRIFTY TIP: Coffee grounds are an excellent source of nitrogen for crops--like corn and lettuce, that thrive and grow much better with an ample supply of nitrogen. A side-dressing (i.e. applying to the base of the plant) of coffee grounds will work wonders, AND if you're a coffee drinker, they're free. In addition to side dressing, coffee grounds are also another awesome component to add to your compost pile/heap).
That is my progress thus far, and now, here are some pictures of my garden. On several occasions, when taking breaks from weeding, I looked up and saw these scenes. I thought it was so pretty and inspirational--that I just took some candids. I hope you enjoy them and draw some inspiration from them...just as I did.


Subscribe to:
Posts (Atom)